Campaigns and Proofs
ProofJump allows you to review multiple proofs together in a "container" known as a campaign. This allows you to group multiple, related proofs together: simplifying collaboration.
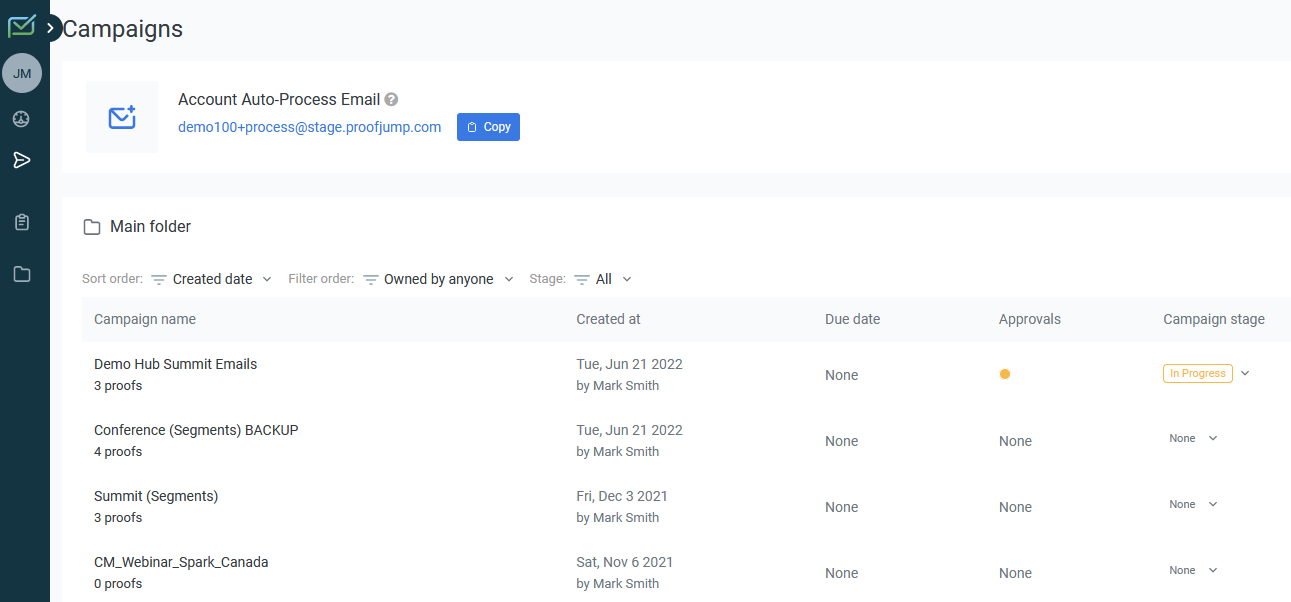
At the highest level, campaigns are accessed and managed from an overview page.
Campaign Overview
From the campaign overview page, you may create a new campaign, delete a campaign, and manage campaigns.
From within a campaign, you can then add and manage proofs:
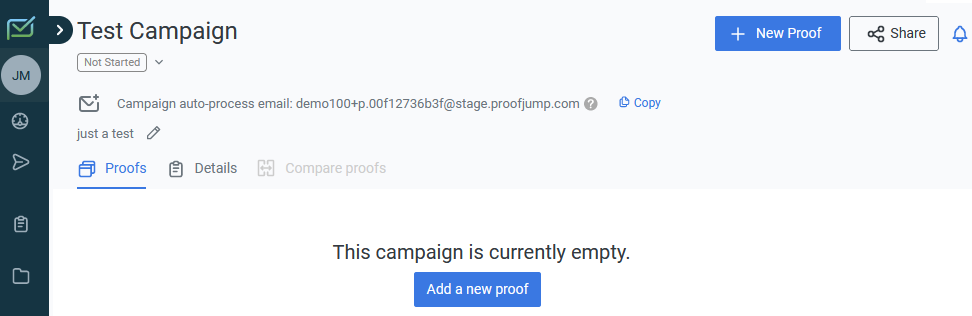
You can proof different kinds of assets in one campaign:
- Image (or visual) proofs for initial design
- HTML proofs
- Pre-prepared email proofs (image or HTML)
Simply email your proof from your email marketing platform (your ESP/eDM, e.g., Mailchimp/Salesforce Marketing).
With ProofJump, you no longer need to switch review tools depending on the stage the campaign is in.
Create a new campaign
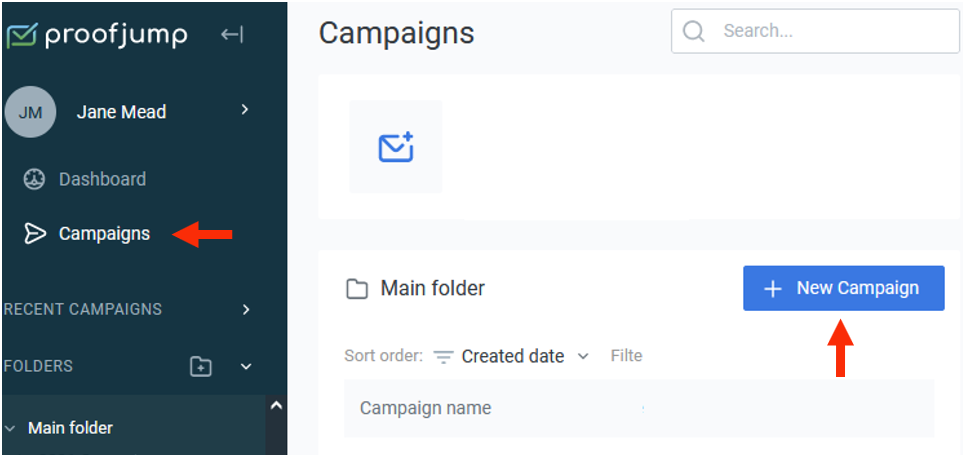
To create a new campaign:
From the sidebar select "Campaigns".
Click "+ New Campaign"
Fill in the form to setup the campaign
Manage campaigns
Click on an individual campaign to manage it and access associated proofs.
Each campaign has several potential states or stages to support the campaign manager:
- None
- Not Started
- On Hold
- In Progress
- Waiting for Approval
- Ready to Send
- Complete
This status is provided directly under the campaign's title, and may be edited using the drop-down.

Or from the list view of each campaign:

Delete a campaign
You will be asked to confirm, please be sure that you wish to delete a campaign and all its associated proofs:

Sidebar
The sidebar supports functions above the level of a proof:
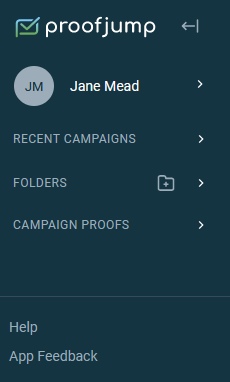
Note that the sidebar can be collapsed and expanded to suit:

1. Manage user
Expand the user drop-down for access to the account and log out:

2. View campaigns
Expand the recent campaigns drop down to view your recent campaigns:
Note that you can tab between "Newest" and "Last Viewed".

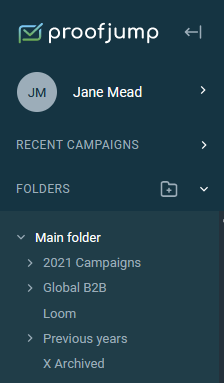
3. Browse Folders
Expand the folders tab to navigate your content:
4. Navigate the Campaign
Expand the campaign proofs tab to view all the proofs within the campaign:

Notice that summary information is available for the proof from the sidebar:
This example shows a proof labelled as "Master" with the "Approved with changes" status.

What Next?
Campaigns manage proofs, so the next step is to understand how to create a proof.
You will find that some of the same functionality that lets you work with proofs is available from the:
so, it helps to familiarize yourself with the functions that support you to review a proof.